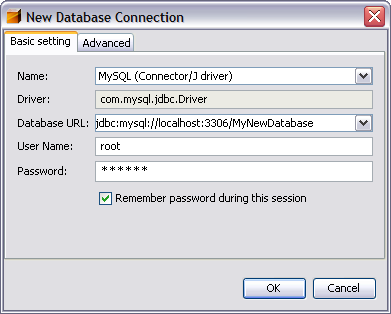
2. In the Basic Setting tab, enter the Database's URL in the corresponding text field. The URL is used to identify the type and location of a database server. In this example, you need to specify the host name (i.e. the location of the server), the port number on which the database communicates, and the name of the database instance being used. In this case you can enter: jdbc:mysql://localhost:3306/MyNewDatabase
3. For User Name and Password, enter root, and nbuser respectively:

New Database Connection dialog containing connection details
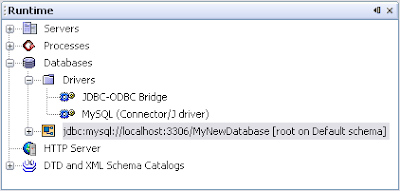
4. Click OK, then click OK again to exit the dialog. A new Connection node displays in the Runtime window's Database explorer under the Databases node:

new connection node displayed in database explorer
You are now connected to MyNewDatabase in the IDE. Note that the new connection node icon appears whole when you are connected to a database. Likewise, it appears broken when there is no connection.
At later stages, when working with databases through the Database explorer, you may need to manually connect to a database. You can do so by right-clicking the broken database connection node and choosing Connect.
1 comment:
I have created a database two ways =
1. using the netbeans 6.5 IDE, connecting as you describe, and creating the table that I want.
2. in java code, using SQL
Now the table that I defined in 1 can not be found in code, and the table that I defined in 2 can not be found in the IDE.
I have tried all sorts of combinations of usernames and so on.
Any suggestions?
Joe Cotton cottonj@gmail.com
Post a Comment